

Shih Tzu Grooming Instructions
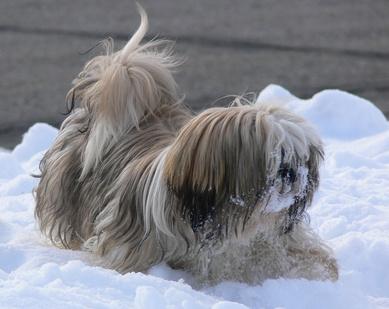
1Wash your shih tzu 7 to 12 days to keep his coat clean. Use either dog shampoo or human shampoo, and lather the dog up in the sink or bathtub using warm water. Rinse the dog thoroughly, and consider using a conditioning rinse to smooth out tangles in the dog’s long hair. Pay particular attention to the hair under your dog’s belly and along his legs, as this is where he’ll be dirtiest.
2Towel the dog dry and keep him in an enclosed area, like the kitchen, while he dries completely. Use a dog brush or comb to begin working any knots out of his hair while he’s still wet, as long hair is more easily detangled when it’s wet and freshly conditioned. Be very gentle when you’re brushing the shih tzu’s hair, as his skin will be sensitive if his hair is pulled.
3Brush your shih tzu’s hair once a day to keep it tangle free and clean. Schedule a time for this, and follow the schedule consistently so that the dog knows when to expect grooming.
4Trim your shih tzu’s nails once a month to keep them from snagging on carpeting or breaking off. Use dog nail trimmers, available at pet stores, to cut only the tips of the nails off. Cutting off too much nail will cause pain and could lead to infection.
5Clean your dog’s eyes and ears every time you wash him. Use a Q-tip to clean any wax and debris out of his ears, but only clean the section that you can see, as pushing a Q-tip too deep into his ear can cause damage. Use eye drops, available at pet stores, and clean cloths to clean his eyes and keep them bright and free of buildup.
6Pull the hair from the top of your dog’s head up into a “top knot,” or ponytail at the top of his head. Secure the pony tail loosely with a rubber band. This will keep it out of his face and allow him to see clearly.
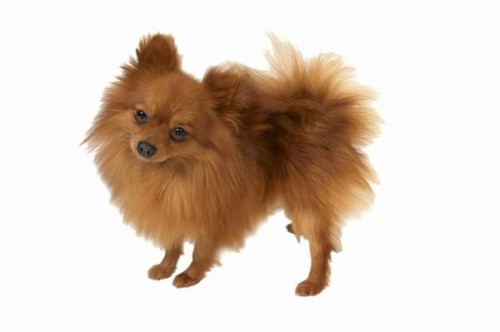
Pomeranian Coat Grooming Tips
Preparing
The first step in grooming a Pomeranian successfully is early preparation. Since the Pomeranian requires routine grooming, it is important she learns early to accept the process. Teaching her to stand for grooming and lie on her side or back when she is a puppy helps make grooming pleasurable for the puppy and the groomer. She should enjoy the bonding time associated with grooming and not dread it.
Brushing
Brushing the Pom daily is ideal, since his thick, double coat will get matted and tangled. However, not every pet owner has an extra 30 minutes a day. In this case, two weekly brushings is the minimum you can get by with to maintain his soft coat. Using a curved-bristle slicker brush, start with the hair on the Pom’s back and hold a section in your free hand. Brush downward from the part using a method referred to as “line brushing.” When brushing your Pom, make sure you don’t bear down too hard and scratch his skin. Follow up with a metal comb, and make sure all mats and tangles are gone. If any remain, hold the hair out from the skin and work them out using the comb, starting at the end of the hair and working toward the skin.
Bathing
The Pomeranian requires a bath only about once a month. After a thorough brushing, wet the Pom and apply a dog shampoo for sensitive skin, such as oatmeal shampoo. Rub the shampoo in until it forms suds. Rinse the Pom well and spritz his coat with a light leave-in conditioner for dogs. Finish up his bath by blotting his coat dry with a towel. Dry the Pom completely using a hairdryer on the lowest setting. Use a slicker brush to enhance the coat’s shine.
Clipping and Trimming
Many Pomeranian owners and breeders choose not to worry with grooming the thick coat. In this case, they choose a lion cut. This cut may be a low-maintenance solution; however, it takes away from the natural protection. Also, once the Pom’s coat is cut short, it may never grow back with the same thickness and shape it had previously. Therefore, scissoring only the anal area and hair under the paws is recommended by the Pet Pom website. Additionally, plucking the hair out of the Pomeranian’s ears helps prevent ear infections. A groomer should clip the Pom’s toenails when they are long.
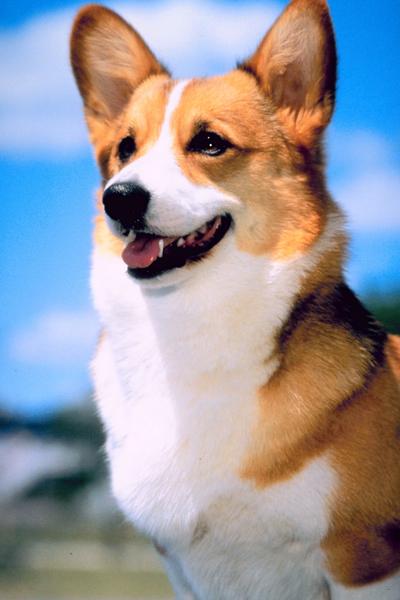
Grooming Tips for Corgis
Brushing
Have your dog stand or lie on his side. Then with a slicker brush in hand, start at the back of the corgi’s hind leg and use the line brushing method, or brush in the direction of the hair growth. This helps remove any debris or tangles from the long, course outer coat and helps the brush reach the shorter undercoat of the double-coated corgi. Brush down the hock on each hind leg then brush the long hair on his thighs. Separate the hair with your free hand and brush it in about 3-inch sections. Continue up the sides brushing the coat in sections. Brush his front legs and chest in the same manner. Finish by brushing his face and ears with the slicker brush.
Bathing
Wet your corgi’s entire coat with lukewarm water. Apply a line of shampoo down his back. For the thick coat of the corgi, a texturizing shampoo that removes dirt but leaves shine works well. Massage the shampoo into the coat, then rinse it with water until the water runs clear. Towel dry your four-legged friend and spray a light leave-in conditioner on his coat; a cream conditioner may be too heavy and leave his coat limp. Finish drying his coat with a hairdryer on the lowest setting.
Trimming
The low-maintenance corgi even needs a slight trim, not a major clipping, every now and then. The most important area is the feet. Trim the hair around the top of the paws and under them around the pads with scissors once every eight weeks. Avoid cutting between the toes since the corgi has webbed toes and you may nip them. Remove any long, stray hairs over the body with scissors. Have a groomer clip your corgi’s toenails and genital area once a month.
Tips
Start grooming your corgi early and teach him to lie on him side for brushing. Since the breed experiences seasonal shedding, early preparation for future grooming is key. When brushing your corgi, look for mats and tangles. If you locate any, use a metal comb and work them out by holding the hair away from the skin and combing from the end of the hair back toward the skin. Before wetting your pup, place cotton balls in his ears to keep water out. When washing him, do not scrub the hair; this may cause tangles or mats to form in it. Never shave the corgi’s coat; the signature double coat may never grow back properly.
Blow Dryers for Dog Grooming

Doggie Dryers
When you drop your fluffy princess off with the groomer, he’ll put your fur ball in a crate with a specialized doggie blow dryer after her bathing is complete. Dog blow dryers basically are big motors with several tubes attached. Often one or more tubes go to multiple crates to dry several dogs at once. These dryers gently blow a steady stream of air onto your pooch, getting rid of every last bit of moisture. However, they don’t blow heated air, only room temperature air to lessen the risk of burns. You also can purchase smaller versions of these types of dog dryers to use at home, which might be beneficial if you tend to bathe your canine on your own frequently.
Hand-Held Dryers
You can use your personal hand-held blow dryer to dry off your beloved pal, but you must be very careful. Human-grade dryers have heating elements inside, designed to make the air very hot for faster drying. This extremely warm air can burn your pooch if you crank up the heat and blow over one spot repeatedly. If you do decide to use your own dryer, turn it to the coolest possible setting. When it comes time to dry your furry lady, keep it on the low stream of air, keep it several inches away from her and move the dryer all over her body, rather than focusing on one spot.
Getting Over Fear
No matter which type of blow dryer you use, it’s perfectly reasonable for her to be scared. After all, blow dryers are noisy and uncomfortable, blowing air right in her face. If your dog runs in fear the split second you whip out the dryer, start associating it with positive things. Leave the blow dryer lying out, without turning it on, and let her sniff at it on her own. When she approaches it, toss a few treats in her direction. After several days of that, she’ll become best friends with the dryer, since she gets rewarded every time she goes near it. As soon as she feels comfortable around it, try turning it on when she’s in the room, only for a few seconds at a time, while offering her treats. It’ll take some time, but if you’re patient and take baby steps, she’ll stop fearing the blow dryer eventually.
Special Considerations
Your little friend has no way of telling you if the blow dryer is bothering her. It could be too hot, burning her fragile skin, or it could be forcefully blowing air directly into her eyes. Because it may be difficult to hear her whimpering with the noisy blower going, watch her closely for signs of distress. If you see her opening up her mouth to cry, shaking in fear or moving away in discomfort, it might be time to put the blow dryer down for a while and let her relax. Towel dry her as much as possible before going back at it again.
How to Hold a Dog for Grooming

Start by laying the dog on its side, and place one hand on his shoulder and one hand on his hip until he lies still. Keep one hand in place, and with the other, brush hair to the skin in layers. Then have the dog stand and hold him under the belly. Brush the hair on the legs and chest.
Head, Ears and Toenails
For the head and ears, have a helper hold the head at the jaw with an arm wrapped around the head. This will free your hands to clip and clean. For toenails, hold the dog against your body, and grasp his elbow firmly. Notice that the foot pops forward and presents the toenails for clipping.
Beginning Dog Grooming
Brushing and Trimming
While you brush your hair after a shower, you should brush your dog’s fur before his bath. This clears away the dead hair that could otherwise end up in your drain. Also, if your dog has mats in his fur, getting them wet makes them more difficult to remove. Choose a brush suited for your dog’s type of fur — for example, short-haired dogs need soft-bristled brushes — and give him a thorough brushing from head to tail at least once a week, and before every bath.
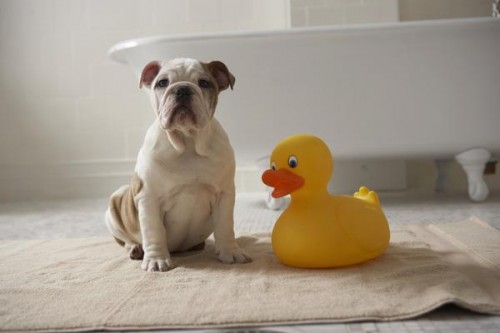
Bathing Your Dog
According to the ASPCA, you should only bathe your dog once every three months, or as needed in between. This is because dogs produce protective, natural oils that coat their skin and fur, and washing your dog can strip those oils away. Choose a low-foaming dog shampoo and wash your dog in lukewarm water, lathering him according to the shampoo’s instructions. Be careful not to get any in his eyes, ears or mouth — when it’s time to wash his face, use a wet washcloth.
Nail Care
When a dog’s nails get too long, they make it difficult for him to walk — this can even affect his gait and his posture, and leave his paws deformed. When your dog’s nails are long enough to hear tapping the ground when he walks, they need to be trimmed. Use a special pair of canine nail clippers and carefully snip the tips, being careful not to cut through the visible vein running into the nail. If you cut this vein, called the quick, apply styptic powder to the cut to stop the bleeding. Not all dogs like having their nails trimmed, especially if this is your first time, so save it for when he’s tired and relaxed. If he resists, don’t force him to undergo all four paws at once — you may have to do a few nails at a time until he gets used to it.
Other Considerations
Your dog’s breed determines the other factors you may need to consider before starting to groom him yourself. For example, pugs and other dogs with facial folds need to have them cleaned out at least once a week. Dogs with large ears, like basset hounds, need to have their ears cleaned out once a week. Ask your veterinarian if your dog has any special needs like these, so you can incorporate them into your new grooming regimen.
Grooming Dogs at Home: Tips

1Assemble your equipment and supplies. Gather your grooming brush and comb, nail clippers, styptic powder and ear cleaner. Add pet shampoo and bath towels. Remember that you cannot leave your dog during the bathing and grooming process, as he can injure himself if he attempts to escape. In addition, his attention span may limit your bathing and grooming time.
2Secure the dog for his grooming session. Find a tub that will securely contain the dog while allowing you control over the session. You can bathe small dogs in the sink or in rubber bins. Make sure the dog has a rubber surface or mat for his feet. Secure him with a grooming lead instead of his regular collar, and make sure the lead can’t accidentally strangle him if he thrashes a bit. Keep a muzzle handy if he is prone to biting during his baths.
3Clean your dog’s ears. Obtain a canine ear-cleaning solution and some clean cotton balls. Hold your dog securely and examine his ears for signs of redness or irritation. Gently trickle a few drops of the ear solution into his ear flap and down into his ear canal, but don’t force the applicator too far in. Massage the base of the dog’s ear to help move the solution along. Use moist cotton balls to remove any debris or discharge from the inside of the ear flap.
4Trim the dog’s toenails. Obtain a pair of high-quality dog nail clippers and some styptic powder. Gently take each paw in your hand, and push on the nail pad to extend the nail. On white nails, you can easily see the quick, or portion with blood vessels.
Gently snip off a small portion of the nail tip, cutting at a 45-degree angle. On dark nails, make very small snips until you see a black dot in the nail’s center. This is the quick that you want to avoid. If you happen to cut the quick and the nail bleeds, blot off the blood. Press some styptic powder into the nail for a few minutes to stop the bleeding. If your dog has dewclaws on the side of his feet, trim those as well.
5Brush the coat to remove debris and mats. All dogs benefit from regular brushing that removes debris, reduces shedding and improves circulation. Gently brush down to the skin while you look for cuts, scrapes or ticks. If the dog has an undercoat and top coat, brush both coat layers carefully. If you find mats behind the dog’s ears or on the legs, remove the mats with a slicker brush featuring short, slanted metal bristles. Do not pull on the mat to remove it, as this is painful for the dog and usually won’t loosen the mat.
6Bathe the dog thoroughly. Run warm (not hot) water over the back of the dog’s head, and on his back and body. Apply pet shampoo to his back down to his tail, and along the back of his head. Gently massage the shampoo throughout the dog’s entire body, except for the front of his head. Rinse by covering the dog’s eyes while you rinse the top of his head. Cover his nose to rinse the rest of his face, and carefully rinse his entire body from the top down. Repeat the shampoo process if the dog is very dirty.
7Dry your dog completely. Gently pat the dog’s coat with bath towels, as this method is less likely to tangle his coat than vigorous rubbing. Carefully use a pet dryer or hair dryer on a very low setting, and don’t aim the dryer at the dog’s face. Make sure the dryer doesn’t get hot, as this can damage the dog’s skin. Also ensure that your dog is completely dry before you send him outside in cool or cold weather.


|
A New Free Course on Dog Grooming Reveals the Secret Step-by-Step Techniques used by the best Dog Groomers in the country!
Finally, You Can Now Groom your Dog on your own at home without having to hire an expensive groomer! |