

More on Dog Anal Gland Care
You might have seen one of the many videos online where a dog is scooting his butt across the floor in a most humorous way. Not only is it unfair to the dog, who has no idea millions of people are laughing at his expense, it’s also a sign of a potentially serious problem – infected anal glands.

Anal glands are a dog’s calling card — they emit some fluid when pressured by urinating or defecating and that same fluid has your dog’s own unique smell. They can also release the smell when a dog is excited, as when meeting another dog. If the glands aren’t expressed naturally and regularly, they become impacted which can lead to infection or even a rupture.
Regular Care of the Anal Glands
Some dogs never have a problem with their anal glands so it’s up to you to be aware of the warning signs. The famous scoot across the floor is a good indication that your dog needs his anal glands expressed. Other signs are a fishy odor around your dog’s behind or soft stool.
The Role of Nutrition
By feeding your dog quality dog food with fewer cereal fillers, he will likely produce firmer stools, which will naturally express the anal glands. Be sure to check with your vet before starting any supplements.
Having a Professional Express the Glands
This is really recommended as an expert is less likely to hurt your dog and can do it quickly and efficiently. You can bring your dog to the vet to get the glands expressed when you notice a sign that they’re impacted. You can also bring him to a professional groomer. A groomer is a good choice because she likely sees your dog every few months and, thus, there’s less time that the glands are going unchecked.
Doing It Yourself
This is not recommended, but if you have no other option but to express the glands yourself, here are some simple instructions. The key is to be calm, prepared, and as quick as possible as this is not a pleasant experience for your dog. First, locate the glands. They are at about five and seven o’clock on either side of his anal opening. Next, wearing latex gloves, apply firm but gentle pressure to the glands. Hold a warm cloth over the opening to prevent a squirt of the nasty fluid. Some fluid should be expelled from the opening. Do not repeat the process; simply wipe your dog with the washcloth and reward him.
Vegetables For Dogs
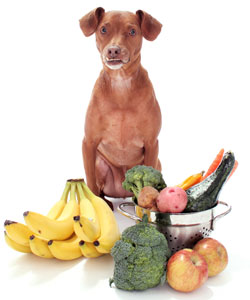
As with all dog food items, portion size is important. Keep your dog’s veggie treats small and talk to your vet about adjusting your dog’s food intake if you are supplementing your dog’s diet with vegetables. Vegetables may be low in calories, but they are not zero calories. Also make sure your dog does not choke on the vegetable in the excitement of eating them.
Watch out for any adverse reaction, such as nausea or loose stools. Sometimes vegetables will cause gas in your dog, so don’t overdo the amount you give him. If you are giving your dog the vegetable for the first time, give him just one small piece and observe his reaction before increasing the size or amount.
There are many ways to serve vegetables for your dogs other than raw, such as cooked, steamed, baked, roasted, grilled or dehydrated. Dogs do enjoy vegetables raw as a yummy treat; however, they have short digestive systems and do not get as many nutrients out of eating vegetables raw as we humans. A good way for dogs to get the full nutrients of the vegetables is to break them down in a pureed form. No matter how you prepare the vegetables for your dogs, do not use salt. Dogs don’t always care for it and it is not good for dogs with heart conditions.
The following are 11 safe, good vegetables for dogs, with suggested cooked preparations and portion sizes for treats.
Asparagus
Preparation: Remove the fibrous ends from the asparagus spears and wash them thoroughly. Toss them with olive oil and grill 30 to 60 seconds on all sides.
Dog treat portion size: Cut into bite size pieces. Feed one to two pieces.
Benefits: Great source of Vitamin K. Good source of Vitamins A, B1, B2, C and E, folate, iron copper, fiber, manganese and potassium.
Broccoli florets
Preparation: Cut broccoli into small florets and wash thoroughly. Place in a steamer and follow the directions. Using a stove, put florets in an open vegetable steamer in a pot with boiling water and cover. Steam for about 6 to 8 minutes until crisp yet tender and bright green. You can also microwave them by putting 2 cups of broccoli florets in a microwave-safe container along with an inch of water for about 5 minutes.
Dog treat portion size: One or two bite size florets
Benefits: Great source of Vitamins C and K. Good source of Vitamin A, folate, manganese and fiber.
Brussels sprouts
Preparation: Choose Brussels sprouts that are green, feel firm and don’t smell too strong. Wash thoroughly and cut off the stems, leaving enough stem that the leaves are still intact. Some chefs advise cutting a little X to in the stem to help the core to cook. You can then microwave the sprouts with water for up to 8 minutes, steam them for 5 minutes or boil the sprouts for up to 10 minutes – a little less for more crunchiness.
Dog treat portion size: 1/2 to 2 sprouts, depending upon the dog’s size
Benefits: Great source of vitamins K and C. Good source of manganese, folate, fiber, potassium and vitamins A, B1 and B6.
Carrots
Preparation: Remove ends and thoroughly wash. Cut into bite size treats and cook in a pot of boiling water for about 10 minutes or steam for two to six minutes until tender.
Dog treat portion size: One or two bite size pieces
Benefits: Great source of vitamin A. Good source of vitamins K and C, fiber and potassium.
Cauliflower
Preparation: Wash thoroughly. To grill the cauliflower, leave a little stalk intact. Marinate the cauliflower for 30 minutes in olive oil and then grill for 5 to 6 minutes on each side until crisp yet tender.
Dog treat portion size: 1 to 2 florets, depending on the dog’s size
Benefits: Great source of vitamin C. Good source of vitamins K and B6, folate and choline.
Cucumbers
Preparation: Wash thoroughly, peel, cut in half and remove seeds. Cut into bite size pieces. Place pieces into pot with boiling water for about 5 minutes. Empty pot into strainer. If the cucumbers are a bit bland, you can add dog-safe seasoning. (No salt)
Dog treat portion size: 1 to 2 bite size pieces
Benefits: Good source of vitamin K.
Edamame
Preparation: Edamame is conveniently available as a frozen vegetable in your local food store. Steam these boiled green soy beans according to the directions on the bag.
Dog treat portion size: One to five unsalted, out-of-shell beans. Note: Always watch your dog eat small food items as he could choke on them in his excitement to gobble them down.
Benefits: Great source of protein, iron, fiber, vitamin K, Omega-3 fats, phosphorus, vitamin B2, potassium, copper and magnesium.
Green beans
Preparation: Wash thoroughly and cut off ends. Use a covered pot to cook green beans in boiling water for about 10 minutes. Serve when cool. You can also cook green beans, brown rice and chicken in chicken broth to serve dogs with an upset tummy.
Dog treat portion size: 1 to 2 bite size pieces
Benefits: Good source of vitamins C, K and A, manganese and fiber.
Peas
Preparation: Fresh peas are usually available as snow, sugar snap or English peas. English peas must be shelled. Snow and sugar snap peas’ shells are edible. You can grill sugar snap and snow peas for about 3 minutes on each side, first lightly coating with olive oil if you prefer. For English peas, you need to shell them first. Cook the peas (minus their pods) in boiling water only two to four minutes until they turn bright green. Drain in a colander.
Dog treat portion size: One or two Sugar snap or snow peas. For English, 1 or 2 tablespoons – depending on the dog’s size
Benefits: Great source of vitamin K, and C. Good source of manganese, fiber, folate, phosphorus, protein, magnesium, copper, iron, zinc, potassium and vitamins B1, A, B6, B3 and B2.
Sweet potatoes
Preparation: Sweet potatoes make a great chew if you dehydrate them. Cut them lengthwise, 1/4-inch thick. Just follow the vegetable dehydration instructions included your dehydrator. You can also feed your dog mashed sweet potatoes. To prepare, peel and wash potatoes. Cut into quarters. Put into boiling water in a large pot and simmer for about 20 minutes. Test potatoes with a fork. When they are fully tender, remove from pot, place in a heat-resistant container and mash with a potato masher.
Dog treat portion size: Half or one dehydrated chew, depending on size of dog. Mix 1 to 2 tablespoons of mashed sweet potato in dog’s dry dog food.
Benefits: Great source of vitamin A. Good source of vitamins C, B6 and B5, manganese, potassium and fiber.
Potatoes
Preparation: Wash thoroughly, and slice into narrow wedges. Don’t peel the potato. Coat with a little olive oil and place on cookie sheet. Roast in oven (425 degrees Fahrenheit) for at least 20 minutes on each side. Roast longer if your dog likes them crispier.
Dog treat portion size: 1 or 2 wedges, depending on dog’s size
Benefits: Good source of vitamins C and B6, potassium, manganese and fiber. Remember, too, that there are some vegetables you should not feed to your dog. Never offer your dog onions or fresh garlic. Talk to your veterinarian if you have questions or concerns regarding vegetables and your dog’s diet.
The Best Dog Breeds for Truffle & Mushroom Hunting
Truffle and Mushroom Hunting
Any dog can potentially become a truffle or mushroom hunter, but not every breed is perfectly suited to the task. You can try out your dog’s skills at truffle hunting clinics held throughout the country. The training period for “professional” truffle hunting canines lasts between two and four months. If you want to purchase a well-trained dog specifically for truffle or mushroom hunting, expect to pay in the six figures.
Lagotto Romagnolo
Originally used as a water dog in the Italian marshes, the Lagotto Romagnolo has been used for truffle hunting since at least the 19th century. Between the end of World War I and the start of World War II, the breed was used by virtually all Italian truffle hunters. The medium-size, curly-haired canine appears in various shades of brown. Besides his keen nose for mushrooms, this smart dog is easy to train and makes a good family pet.
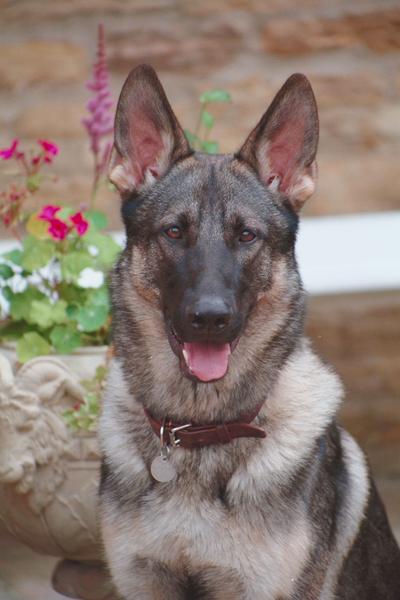
Detection Breeds
Dogs that shine at detection work often succeed in truffle hunting. These breeds include the German shepherd and Belgian malinois, dogs used by law enforcement and security agencies worldwide. Not only are these dogs talented truffle hunters, but they’re also smart and easily trained, and they possess a good work ethic. While scenting is paramount in truffle training, it’s of little use unless the canine is also obedient and cooperative. The same sort of discipline required for truffle hunting is needed for the more serious pursuits of bomb detection or search-and-rescue.
Sporting Breeds
Dogs bred specifically for sport, such as Labrador and golden retrievers, can excel as truffle hunters. So can various types of setters and pointers. Even beagles can make good truffle hunters, since they’re especially ruled by their noses. If you want to train a sporting breed for the task, choose a dog from field lines rather than from show lines: Breeders of the former make a special effort to pass on hunting talent in their dogs.
What Are the Pros & Cons of Adopting Two Dogs at Once?
Training
One huge advantage to adopting two dogs at once is you’re able to train two dogs at once. If you plan to eventually have two dogs, it’s best to adopt them both at once for easier training. You can work on housebreaking, crate training, and other basic training at one time. This can be much more beneficial than adopting dogs separately because it will greatly reduce the time spent. There are also cons to training two dogs at once. When you come home, you may have no idea which dog peed on the floor or destroyed your shoe. Another con is trying to wrangle two dogs who are misbehaving.
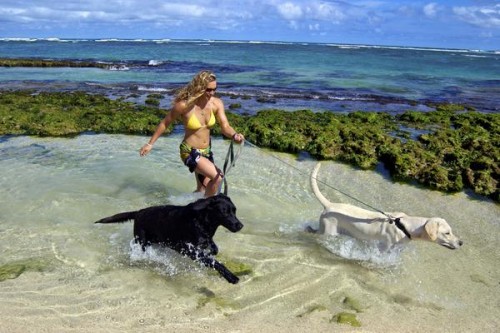
Companionship
Adopting two dogs at once ensures that your new dogs always have someone to play with. If you work outside the home, your dog will be less likely to experience separation anxiety, because he has someone to play with. You must remember, though, that dogs will establish a pack. Good owners are always seen as the alpha in the pack, but the dogs will then choose who is next in command, and may fight until they establish the order.
Stress
Adopting two dogs at the same time can also be stressful for both you and the dogs. First of all, the dogs may not get along and may try to exert dominance over each other. Another problem arises if you try to house both dogs in the same crate. This can create anxiety in the dogs as they fight for their own space. Dogs can also experience separation anxiety if they become close and one passes away.
Expenses
Adopting two dogs at once can also be very expensive. Not only will you have the adoption cost, but you will need to buy two of everything all at once. This means two collars and leashes, two crates and enough bedding for two crates, two food bowls and two water bowls. When you adopt pets separately, you’re better able to handle the costs. Never underestimate the costs of raising a pet. Even if you save money adopting, purchasing all the supplies will be costly, especially if you’re buying for two. Veterinarian costs can also add up.
Petco Removing All Dog and Cat Treats Made in China From Store Shelves

No proof has been found to conclusively link jerky to the pet illnesses. Most of the jerky was produced in China.
Chinese-made dog and cat treats will disappear from Petco’s 1,300 stores, its website and Unleashed by Petco locations over the coming months.
“We know some pet parents are wary of dog and cat treats made in China, especially chicken jerky products, and we’ve heard their concerns,” says Petco CEO Jim Myers.
“Very simply, we feel this decision is in the best interest of the pets we all love and, ultimately, for our business,” he adds.
The FDA investigation and the agency’s latest update spurred Petco to act.
“We’ve been following the FDA warnings and related customer concerns closely, and we’ve been actively reducing our China-made assortment and expanding our American-made offerings for several years now,” Myers says. “We know the FDA hasn’t yet identified a direct cause for the reported illnesses, but we decided the uncertainty of the situation outweighs the lack of actual proof.
“It has taken some time and careful thought to get to this point, but we’re proud to make the change and we believe our customers will be pleased with it as well.”
Among the brands Petco is touting as alternatives to Chinese-made treats are selections from U.S. companies such as American Jerky, Blue Buffalo, Canidae, Dogswell, Merrick, Nature’s Variety and Zuke’s as well as treats and chews from New Zealand, Australia and South America.
The Koehler Method of Dog Training
About William Koehler
William Koehler was a specialist dog trainer who trained dogs for film. He was famously unsentimental and would use pain as much as he would he use reward in order to motivate a dog to perform an action. While modern trainers typically favor positive reinforcement, Koehler advocated a balance of positive reinforcement and positive punishment. In short, he introduced positive stimuli, or rewards, to a dog’s environment when the dog did good and introduced negative stimuli, or punishment to a dog’s environment when the dog did bad.
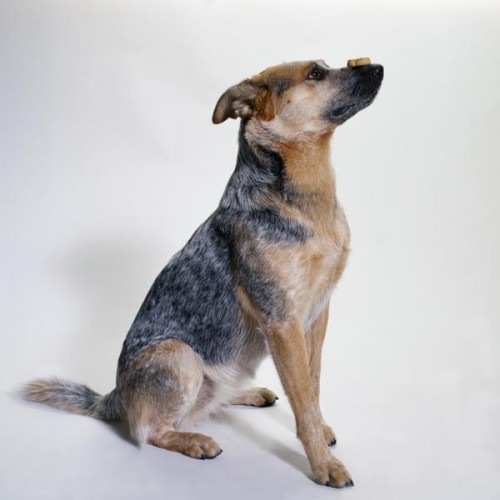
Goals of the Koehler Method
The Koehler method sets out to empower all dog owners to have off-leash control of their dogs. To achieve this, owners must first teach the dog that certain actions have good consequences and other actions have bad consequences. The outcome of this approach is that the owner need not rely on the leash to control the dog, because the dog understands clearly which actions are desirable and which are not.
Philosophy of Choice
Koehler, like many noted dog trainers, believed that dogs perform actions out of choice. For example, a dog will choose to tip over a bin to eat some of the contents. Because those contents taste good, he’s likely to choose to perform this action again. However, if the contents of the bin were distasteful to the dog, he would be unlikely to repeat the action. Koehler’s method utilizes this philosophy.
Learning Patterns
The key tenet of Koehler’s method is the learning pattern “Action > Memory > Desire.” Koehler’s entire process assumes that when a dog performs an action, his memory of that action inform his desire to repeat it. So if a dog barks and is subsequently punished, his memory of that action is negative, lowering the chances of him desiring to repeat it. But if the dog is rewarded, his memory of barking is positive and the chances of him wishing to repeat it increase.
Why Is My Dog Scared of Thunderstorms and What Can I Do About It?
Q: Why is my dog so afraid of thunder and how can I make him less scared?
A: Many dogs are afraid of thunder simply because they do not understand what it is. Dogs hear this loud noise and perceive it as something threatening.
It is important, however, not to try to soothe your pet too much. Doing so can actually encourage his fear if he senses any insecurity in your voice.
During a thunderstorm, try to provide a background noise for your dog, such as TV or radio. This may help to somewhat drown out the noise of the thunder. You can also try to get your dog’s mind off the storm by playing with him.
There are some dogs that require sedation when there is a storm. Consult your veterinarian so that they can prescribe something to calm your dog during a storm.


| A New Free Course on Dog Grooming Reveals the Secret Step-by-Step Techniques used by the best Dog Groomers in the country! Finally, You Can Now Groom your Dog on your own at home without having to hire an expensive groomer! |