

Dogs & Conformation Training
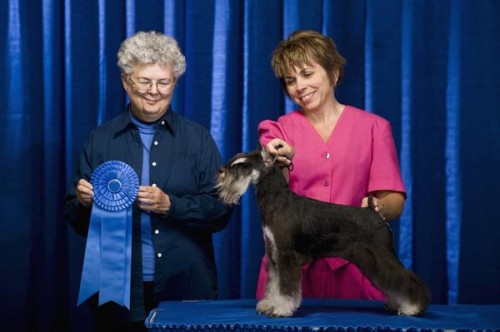
Conformation Shows
Start by familiarizing yourself with the breed and grooming standard for your particular dog, then the rules and regulations regarding conformation classes. Visit shows or watch them on television to get a feel for the competition. Speak with breeders about purchasing a show-quality puppy. Pet-quality puppies make wonderful companions, but they won’t make it in the show ring. Before starting conformation-specific training, make sure your puppy or dog has what it takes to succeed. If he’s got the potential, your local parent breed or an all-breed club can help you navigate the next steps.
Basic Obedience
Training for the show ring should go hand-in-hand with basic obedience training. Your dog should know the commands “sit,” “stand,” “stay,” “down” and “heel.” Work particularly on “stand and stay,” as this is the position in which the dog is judged. Taking your puppy to obedience classes also exposes him to other dogs, a must for the potential show canine.
Stacking
To best display his assets, your dog must learn to “stack” correctly. Some dogs do this naturally, while others need considerable training. Although the correct stack varies by breeds, in most cases the animal’s forelegs stack in alignment with the withers, with rear pasterns aligned at a 90 degree angle from the ground. You are permitted to manually stack your dog, moving each foot into the correct position, but free-stacking is preferred. That involves not touching your dog, but having him stack himself via voice or gestural commands.
Baiting
Training your dog to look at you on command is imperative if you plan to compete. So-called “bait training” uses a food incentive, but a few other incentives work as well with canines. Start by repeating a word, such as “treat” while your dog consumes his food. That ensures the word has a pleasurable connotation. During obedience training, keep treats — or kibble — in your pocket and use the term when your dog is performing a stand-stay. Your dog looks at you while extending his neck, which, if done correctly, puts him in the correct pose for showing off the breed silhouette. While you can use the word whenever you want the dog’s attention, do not use it when your dog sits, as conformation classes do not involve sitting and you don’t want him to react improperly.
Raising Puppies in the First Few Weeks of Life
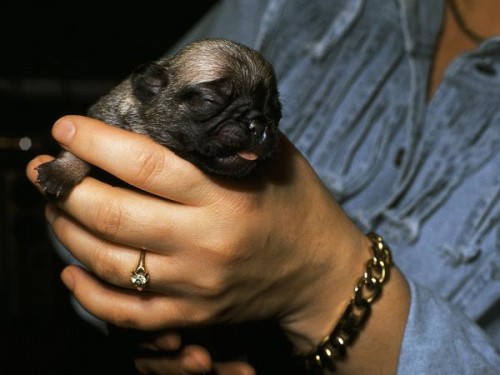
Feeding
1Heat up the puppy formula, often called “milk replacer,” to a lukewarm temperature by placing the formula in a container and then in a bowl of hot water. Boiling water will be too hot and microwaves can be uneven. You can also use a bottle warmer if you have one handy. Just as with checking formula for a human infant, test it on the inside of your wrist to make sure it’s not too hot.
2Put the formula in a specialized nursing bottle or an eyedropper. Before feeding her, make sure that the formula doesn’t run out of the nipple by turning it upside down — if it does it means the hole in the nipple is too big. This could result in drowning or other problems for your baby pups.
3Hold the pup with her belly on your hand or forearm and gently cradle her head. then put the nipple to her mouth. Do this every two to three hours throughout the day for the first week or two, then reduce it to every six to eight hours after the third week.
4Mix the formula with wet or dry puppy food when the pups reach 3 to 4 weeks old. Place the mixture on a flat saucer. The consistency should be similar to that of oatmeal. This will start the weaning process. Put some of this mixture on the tip of your finger and hold it to the puppy’s mouth then slowly move your finger to the saucer of food.
Warmth and Hygiene
1Place a heating pad or hot water bottle under a blanket or towel in the puppy’s nesting box. Mother dogs keep their babies warm by nuzzling them and keeping them close. The heating source mimics this. During the first week, the ideal temperature should be around 85 to 90 degrees. You can drop this to 80 degrees for the next month or so. Puppies over 6 weeks can handle 75 degrees.
2Dip a cotton ball in warm — not hot — water and gently rub their anal region and lower abdomen with it. This will help stimulate elimination, as puppies won’t do this on their own. Don’t rub too hard or for too long; a couple of minutes suffices.
3Wash the puppies’ bodies with warm water after elimination, either urination or defecation. Wash with a very soft washcloth to do this. Urine can cause skin burns similar to diaper rash, while feces may cause infection or invite parasites.
4Massage newborns gently all over their body with your fingertips or a soft, dry cloth to help stimulate them and mimic their mother’s love.
Instructions on Grooming Dog Paws
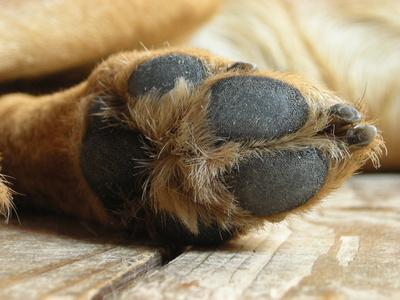
1Inspect your dog’s paws weekly. Look for signs of dryness or cracking in the pads, torn or overgrown nails, and minor cuts anywhere in the paw. Check for small objects that might be lodged between pads. Use tweezers to remove anything you find. Praise your dog during an inspection to send the message that paw handling is a good thing.
2Trim the fur around the paws. When long paw fur becomes matted it can hide irritating objects such as small stones and soot. Matted fur itself becomes an irritant when it cakes and hardens. Remove this fur carefully with scissors, clipping in small snips rather than cutting large chunks of hair at a time.
3Examine nails and trim as needed. Clip after a bath, when nails will be softer, and use a trimmer designed for dog nails. Take care not to trim too short, as dog nails contain a small vein, called a quick, and clipping too close to the quick can cause bleeding and pain.
4Massage Vitamin E oil or paw wax into your dog’s pads to keep them soft and prevent drying and cracking, which can be very painful. If using Vitamin E, poke a hole in a few capsules and squeeze out as much oil as needed to massage into pads. Paw wax, which can be purchased online or at pet shops, protects pads from rock salt in winter and hot pavement in summer by forming a protective barrier.
5Watch for paw licking or chewing, which can be triggered by allergies or irritants. Keep your dog away from lawn chemicals and any known allergens, including ragweed or plants in your yard, to help maintain paw health. If a dog’s paw licking becomes obsessive, seek veterinary care to determine the cause and develop a treatment.
6Handle your dog’s paws while playing or petting so the animal becomes accustomed to you touching the paws when you’re not grooming. This should be easy to do with puppies, but older dogs that are not used to being paw handled may protest. Work gently to convince an uncomfortable dog that your handling of its paws can be a time of bonding.
Homemade Dog Food for Elderly Dogs
Seniors’ Nutritional Needs
In general all dogs need the same basic essentials in their diets. Protein, fats and carbohydrates are all necessary to keep your dog healthy. You’ll need to do some adjusting for your geriatric pooch, though. As your dog ages his protein needs stay the same, but his metabolism slows down. That means he’ll need to get the same amount of protein but do it while taking in less calories. Increase the fiber, cut the carbs and use sources of lean protein like poultry, fish, lamb or extremely lean beef to accomplish this.
Supplements
To assure that your older dog is getting all of the vitamins and minerals he needs, you might consider adding some human grade bonemeal and a few drops of a vitamin supplement to the food you make for him. Omega-3’s are another supplement that you can add that will help keep your dog’s joints and heart healthy as well as keep his coat shiny and soft.
Talk To Your Vet
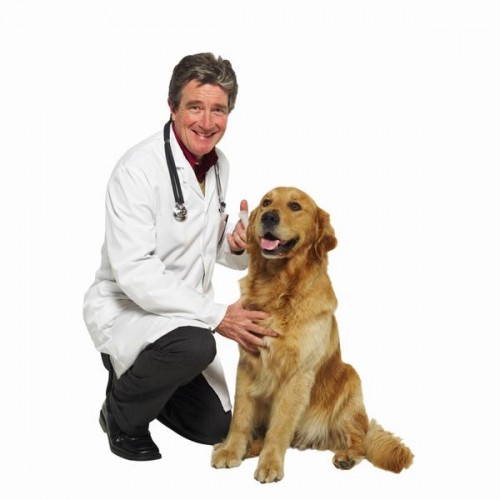
Once you have a plan and know what you want to put into your elderly dog’s homemade meals, talk to your vet to get advice on foods and nutrients that your dog might need based on his health. Certain medical issues like kidney disease, heart disease or diabetes may affect what ingredients you can use in your dog’s food and how much of it you can put in. Show your vet the recipe you intend to use and get his thoughts. He’ll also be the best person to ask about vitamin supplements. Just because your dog is older doesn’t mean that he has a vitamin deficiency. Instead of OD’ing your dog on vitamins, make sure your vet recommends adding them — or any supplement — to his meals.
Basic Senior Recipe
A basic dog food recipe that will be tasty and healthy for your senior citizen canine is easily made by crumbling 1 pound of ground turkey into a large pot containing six cups of water and one teaspoon of dried rosemary. Stir to distribute the turkey and rosemary evenly and bring it to a boil over high heat. Once the mixture boils, reduce the heat to low and allow it to simmer for 20 minutes. Add 8 ounces of frozen vegetables, like carrots, broccoli and cauliflower — thawed and cut into small pieces — and cook for five minutes more. Remove the pot from the heat and allow it to cool to room temperature before you feed it to your dog. Store the leftovers in the fridge in a covered container.


| A New Free Course on Dog Grooming Reveals the Secret Step-by-Step Techniques used by the best Dog Groomers in the country! Finally, You Can Now Groom your Dog on your own at home without having to hire an expensive groomer! |